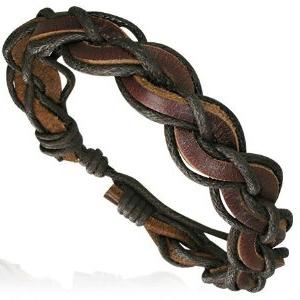
How to make bracelets by yourself: for beginners
For everyone who likes to be bright, fashionable,stand out from the gray crowd, there is an excellent opportunity - weaving accessories from rubber bands Loom bands. Bracelets with your own hands for beginners can be done in many ways. The simplest are described below.
Weaving variants and design of products
If you look closely at photos of these brightornaments, you can understand that the patterns are made in different ways. The figure can be defined as the kind of interlacing of elements, and color combinations. Due to the wide range of colors of rubber bands, it is enough to master only the simplest schemes to make beautiful bracelets with your own hands. For beginners this is quite affordable. Using combinations of colors in any sequence, even for one pattern it's easy to create many different ornaments for the wrist.

Materials and devices
For work you will need:
- Rubber bands for bracelets.
- Plastic lock for fastening the product into a ring.
- The device for weaving (machine, slingshot, fork), although you can just work with your fingers.
- Hook (enough conventional knitting, but sold and special) for the convenience of throwing loops.
All of the above is easy to acquire bySeparate, but you can buy a set for bracelets. In addition to the necessary tools, it includes rubber bands in a large number and assortment of colors. So this option is convenient. By the way, a great idea for a gift girlfriend.
Simple bracelets with your own hands for beginners on the fingers
If you decide solely to try a new oneoccupation and do not intend to get involved in it, you can do without buying any additional tools. Get only the rubber bands for the bracelets and get to work. For the first experiment, take the elements of the same color. The sequence of actions will be as follows:
- On the middle and index finger, put on the first gum in the form of a figure eight.
- Take the second and put on both fingers without crossing.
- Do the same with the third one.
- Prydte first the right side of the bottom gum-eight and toss it over the top, taking it off your finger to the middle.
- Similarly do the left part of the lower band.
- Put one more element on top of the rest without crossing.
- Now repeat the previous three steps again. Do this until the correct length is obtained.
- Connect the last loop from the first real one (the element of the figure-eight can be removed) with the help of a plastic fastener in the form of an eight or a ringlet (which one you buy).
All is ready.

Braiding from elastics: bracelets on a slingshot
The same sequence of steps is easyperform with a special device. This is much more convenient, since the hands are always free. In addition, bracelets on the slingshot can be done in one more way:
- Put on the first gum of eight on both horn slings.
- The second is to be worn without crossing.
- Take a few gums of one or different colors and place on any of the horns.
- Another rubber band (better than the same color as the first two) put a ring on both horns;
- Remove the right and left parts of the first crossed rubber band through the tips of the horns to the middle, as was done in the previous method on the fingers.
- Repeat the steps to the desired length.
- Put the buckle on.
The product is complete.

Weaving on the fork
If you take a plastic disposable tabledevice and remove the middle denticles, then it is easy to use this tool similarly to a slingshot or fingers. On four denticles, you can get other patterns, while the bracelet will be wider and more effective. Work as follows:
- Take an elastic band and fold it in half in the form of two rings, cross them with a figure eight and put on two middle prongs of the plug.
- Do the same for the leftmost andsecond, and also the extreme right and third, if you number them from left to right. You will get a fork braided by rings, and on the middle two denticles the rings will be in two rows.
- Add the next elastic band twice, but do not cross, but immediately put on the middle teeth of the plug.
- Gently pick up the lower loops from the middle and swing them through the tops back behind the teeth.
- Take another pair of rubber bands and, folding them in half, as in the previous steps, put two teeth on the left and two on the right.
- Throw the bottom loops successively on each tooth through the tips back behind the plane of the fork.
- Repeat steps 3 through 6 until the desired length of the bracelet.
- Remove the loops from the outer teeth to the nearest medium.
- Follow step 3 and 4.
- From the remaining two loops, swing one overanother. Remove from the plug and insert the lock. It is more convenient to use the hook to thread the plastic element in the eyelets. The second end is threaded into the first loop of the bracelet.

You got a wide product with a neatpattern. This option can be performed both from one color, and consistently alternating different shades. It is worth noting that for the convenience of removing the loops it is better to use a toothpick. It is much easier than just fingers, to poke small rings.
Weaving on the machine
Fittings for bracelets are now presenteda wide range of accessories and parts. If you look at the big set for this kind of creativity, you will see that, besides slingshots and hooks, plastic machines enter there. Usually they look like coasters with removable posts.

For each product, you can set a certainthe number of rods in one or more rows. To work on the machine, any of the above weaving methods is suitable. For those that were offered for fingers and slingshots, you need to use two poles on the machine, and for the latter, proposed for the plug, respectively, four.
As you can see, bracelets with their own hands for beginnersare made very easily. The listed methods can be realized with the help of any tool or only on the fingers. Choose your favorite method of weaving and adaptation. Create fashionable jewelry yourself.
</ p>